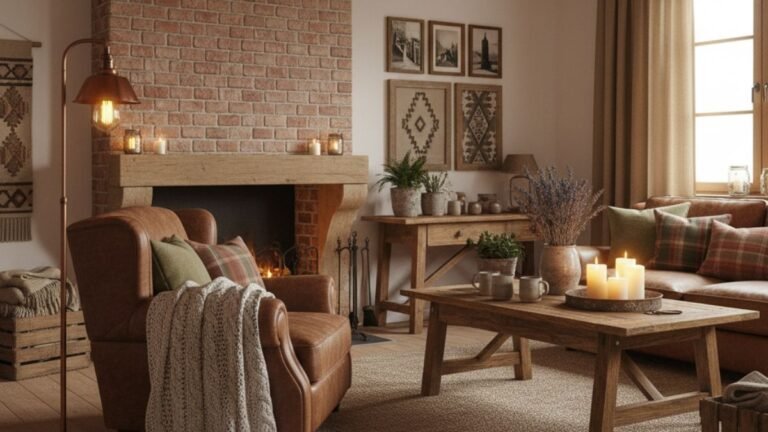
Rug Hung On Wall

Hanging a rug on a wall is a fantastic way to transform a room. It can act as a large-scale piece of art, a sound dampener, and a source of texture and warmth.
Here is a guide on hanging a rug on the wall, from the benefits to the best methods.
Why Hang a Rug on a Wall?
- Statement Art: A beautiful rug can serve as a dramatic and unique focal point, often for a fraction of the cost of a similarly sized painting.
- Sound Dampening: In rooms with echoes or hardwood floors, a textile on the wall can significantly absorb sound, making the space feel quieter and cozier.
- Adds Texture & Warmth: Rugs introduce a soft, tactile element to a room that paint or wallpaper cannot.
- Protects a Valuable Rug: It’s an excellent way to display a delicate, antique, or valuable rug without subjecting it to foot traffic.
- Fills a Large, Blank Wall: It’s an ideal solution for large, empty walls, such as those behind a sofa or bed, or in a long hallway.
Important Considerations Before You Start
- Weight of the Rug: This is the most critical factor. A heavy wool rug requires a much sturdier mounting system than a lightweight flat-weave or kilim.
- Wall Type: Are you drilling into drywall, plaster, brick, or concrete? You will need the appropriate screws and anchors for your wall type to ensure a secure hold. For drywall, always try to find a wall stud. If you can’t, use heavy-duty drywall anchors.
- Rug’s Condition: For antique or fragile rugs, choose a method that distributes weight evenly and doesn’t require altering the rug itself (e.g., avoid adhesives or tack strips).
- Sunlight: Avoid hanging a rug in direct, prolonged sunlight, as the colors can fade over time.
- Cleanliness: Ensure the rug is thoroughly cleaned before you hang it.
Methods for Hanging a Rug
Here are the most common methods, ranging from least to most invasive.
Rug Clips or Clamps (Least Invasive)
This method is simple, requires no alteration to the rug, and works well for lightweight to medium-weight rugs.
- How it works: Strong clips or clamps grip the top edge of the rug. These clips are then hung from nails or screws in the wall.
- Pros: Easy to install and remove, no damage to the rug, modern or rustic aesthetic.
- Cons: The clips are visible. For heavier rugs, the weight is concentrated at the clip points, which could potentially cause stretching over time.
- Best for: Kilims, flat-weaves, and small-to-medium sized rugs where a casual look is desired.
Velcro (Hook-and-Loop) Strips
This is a very popular and effective method that provides a clean, “floating” look.
- How it works: The rough “hook” side of the Velcro is attached to the wall, and the soft “loop” side is attached to the back of the rug.
- To do it right:
- Attach a thin, flat wooden batten (like a 1×3 inch piece of lumber) to the wall with screws, ensuring it’s level.
- Staple or glue the “hook” side of a 2-inch wide Velcro strip to the wooden batten. This provides a much more secure anchor than sticking it directly to the wall.
- Hand-sew the soft “loop” side of the Velcro to the back of the rug along its top edge. Do not use adhesive on the rug itself, as it can damage the fibers over time. For heavy rugs, you may need to add strips along the sides or bottom as well.
- Press the rug firmly onto the strip on the wall.
- Pros: Invisible mounting, distributes weight very evenly, easy to take down for cleaning.
- Cons: Requires sewing. The wall-side installation is more involved.
Casing and a Rod (The Professional Method)
This is how tapestries are traditionally hung in museums. It’s excellent for heavy and valuable rugs.
- How it works: A fabric sleeve, or “casing,” is sewn onto the back of the rug. A curtain rod or wooden dowel is inserted through the casing, and the rod is then placed on brackets secured to the wall.
- To do it right:
- Choose a sturdy fabric like canvas or cotton twill for the casing. It should be a few inches shorter than the width of the rug.
- Sew the casing horizontally across the top back of the rug, about an inch from the edge. Make sure to only stitch through the backing of the rug, not all the way to the front pile.
- Mount curtain rod brackets to the wall, ensuring they are level and can support the rug’s weight.
- Slide the rod or dowel through the casing and place it on the brackets.
- Pros: Excellent weight distribution, very secure, looks professional, considered the archival standard.
- Cons: Requires careful sewing and permanently alters the back of the rug (though in an accepted way).
Carpet Tack Strips (Permanent and Flush)
This method is very secure but is invasive to both the wall and the rug. It’s best for a permanent installation where you want the rug completely flush with the wall.
- How it works: Carpet tack strips (wooden strips with angled pins) are nailed to the wall, and the rug is stretched and pressed onto the sharp pins.
- Pros: Very secure, creates a flat, “upholstered wall” look.
- Cons: Can damage the rug’s fibers, difficult to remove without causing damage, not recommended for valuable or delicate rugs.
By choosing the right method for your specific rug and wall, you can safely and beautifully display it as the work of art it is.
If you’re looking for more home decor ideas like Punch Needle Room Decor and Aesthetic Room Decor subscribe to join us.


